• BLOG
  • Classes
  • STORE
  • About
Menu

Superholly

  • BLOG
  • Classes
  • STORE
  • About
dsc00284-looking-down-superholly.jpg

Ursula making waves!

November 1, 2016

I tackled Ursula, tentacles and all, and I must say I'm rather pleased with the outcome! I documented the costume creating process in a 4 minute YouTube video so check it out, you POOR UNFORTUNATE SOULS! Complete list of items needed and links below!
Hope you enjoyed your Halloween! x0x0 ~~~~~~~~~~~~~~~~~~~~~~~~~~~~

Me aventé el disfraz de Ursula, con todo y tentáculos, ¡y me ha encantado el resultado! Documenté el proceso en un video de YouTube de 4 minutos; échenle un ojo. Una lista completa de los materiales necesarios con enlaces abajo.
¡Espero que hayan disfrutado su Halloween!xoxoxo

dsc00227.jpg
dsc00228.jpg
dsc00254.jpg
ursula-costume-superholly.jpg
dsc00309.jpg
superholly-as-ursula.jpg


Materials for the Costume:
 

I compiled the amazon links into my Ursula Costume Idea List, though not all the materials are available on Amazon.  Please look at the whole list below for all of the items you'll need.

1.5 yards black satin fabric (Craft or Fabric store or Amazon) 

1.5 yards lavender satin fabric (Craft or Fabric store or Amazon)

1 bag of sea shells (Craft or Fabric store) 

1 leather cord (Craft or Fabric store)

yellow & purple acrylic paint (Craft store) orchid http://amzn.to/2wRDodR lilac http://amzn.to/2vqSy9P

Satin acrylic white paint

yellow acrylic paint

gold for shell

Earring posts

Poly fill for tentacles

1 belt with double grommet holes

14 gage wire (Hardware store)

Also needed: A needle and thread, good scissors for cloth, wire cutters, brown paper to draw pattern of tentacles, a plate to mix paint. 

Makeup

1. Forever Primer

2. Ben Nye MagiCake AquaPaint Light Lavender

3. Ben Nye MagiCake AquaPaint Cloud White

4. Ben Nye MagiCake AquaPaint Royal Purple

5. Urban Decay Primer Potion http://amzn.to/2wICYGt

6. Kryclan Eye Shadow Turquoise

7. Mac Eye Shadow Blue Edge

8. Liquid Eyeliner

9. Huda Beauty Eyelashes- Carmen #9

10. Becca Highlight Champaigne Pop

11. Clinique Quickliner Rich Red

12. Cover Girl Lipstick Garnet Flame

13. Ben Nye Final Seal

14. Reel Creations Blue Aqua Sealer

Hair:

Rave Clima Shield Baby Powder

The DRESS

I couldn't find the dress online, but here are a few that might work:

Plain Strapless Bandeau Padded Skater Dress http://amzn.to/2xTTYta http://wheretoget.it/link/2410940

Tube Top Stretchy Skater Dress http://amzn.to/2xVWf7u


Check Out My Other Costumes!

2018-10-02 (5).png

DIY Starbucks mermaid

Catrinas.jpg

Sugar Skull for couples

maléfica.jpg

Maleficent Transformation

brillantina.jpg

Full Face of Glitter Challenge

costume collage.jpg


Cruella DeVille, Corpse Bride, and Barbie

In do-it-yourself, dressing up, photos Tags DIY, Halloween costumes, homemade, just for fun, makeup, sewing, tutorial, Ursula
9 Comments
sugar-skull-8a-mouth-line.jpg

Sugar skull makeup tutorial

March 8, 2015

For those of you who would like a step-by-step tutorial of how I did my sugar skull makeup for Dia de Muertos, here you have it! You know how great it feels when the image you have in your head actually manages to manifest itself successfully in real life? That's what happened to me here. Feel free to modify any aspect (colors, designs, techniques) as you see fit. If you're more of a video type of person, scroll to the bottom and check it out!

~~~~~~~~~~~~~~~~~~~~~~~~~~~~~~~~

Para los que quieren un tutorial paso a paso de cómo hice mi maquillaje de catrina para el Día de Muertos, aquí lo tienen! ¿Sabes cómo se siente cuando la imagen que tienes en tu cabeza se logra materializar con éxito? Esto es lo que me pasó aquí. Siéntete libre de modificar cualquier aspecto (colores, diseños, técnicas) como tú quieras. Si te agradan más los videos, ¡checa el que dejé hasta abajo de este post!

start by hiding your eyebrows with a glue stick / empieza escondiendo tus cejas con pegamento en barra

start by hiding your eyebrows with a glue stick / empieza escondiendo tus cejas con pegamento en barra

use 3 shadows on eye sockets and line with black liquid liner / usa 3 sombras en las cuencas de los ojos y delineador líquido negro alrededor

use 3 shadows on eye sockets and line with black liquid liner / usa 3 sombras en las cuencas de los ojos y delineador líquido negro alrededor

mix a few drops of foundation into white facepaint and apply all over your face / mezcla unas gotitas de base regular con pintura facial blanca, y aplica

mix a few drops of foundation into white facepaint and apply all over your face / mezcla unas gotitas de base regular con pintura facial blanca, y aplica

contour your face with turquoise eyeshadow / contornea tu rostro con sombra de color turquesa

contour your face with turquoise eyeshadow / contornea tu rostro con sombra de color turquesa

apply a mint green lip color, blend the mint into the turquoise / aplica un labial de color verde menta, mezcla con la sombra turquesa

apply a mint green lip color, blend the mint into the turquoise / aplica un labial de color verde menta, mezcla con la sombra turquesa

draw on the nose and fill it in with black liquid liner / dibuja la nariz y rellenalo con delineador líquido negro

draw on the nose and fill it in with black liquid liner / dibuja la nariz y rellenalo con delineador líquido negro

draw your jawline connecting your cheekbones to your mouth / dibuja tu mandíbula, conectando tus pómulos con tu boca

draw your jawline connecting your cheekbones to your mouth / dibuja tu mandíbula, conectando tus pómulos con tu boca

add teeth. add dimension and shadow so they look more realistic / empieza con los dientes. añade sombras para que se vean mas reales

add teeth. add dimension and shadow so they look more realistic / empieza con los dientes. añade sombras para que se vean mas reales

shade under the jawline with black eyeshadow / utiliza sombra negra para rellenar abajo de la línea que dibujaste

shade under the jawline with black eyeshadow / utiliza sombra negra para rellenar abajo de la línea que dibujaste

draw in embellishments to make your skull look more festive / dibuja adornos para que se vea más alegre la calavera

draw in embellishments to make your skull look more festive / dibuja adornos para que se vea más alegre la calavera

bring the colors all the way down your neck / pinta tu cuello también

bring the colors all the way down your neck / pinta tu cuello también

place faux jewels around your eyes with eyelash glue / coloca joyitas alrededor de tus ojos con pegamento para pestañas

place faux jewels around your eyes with eyelash glue / coloca joyitas alrededor de tus ojos con pegamento para pestañas

put on a beautiful headpiece (I made mine with flowers from Michaels) / ponte una diadema de flores (yo hice la mía a mano)

put on a beautiful headpiece (I made mine with flowers from Michaels) / ponte una diadema de flores (yo hice la mía a mano)

finished! / FIN!

finished! / FIN!


Check out my other Halloween Costumes!

2018-10-02 (5).png

Starbucks Mermaid Costume

ursula.jpg

Ursula making Waves

brillantina.jpg

Full face of glitter look

maléfica.jpg

Maleficent Transformation

faces collage.jpg

diy Costume lookbook

In beauty, do-it-yourself, dressing up, Projects, video Tags catrina, dia de muertos, makeup, sugar skull, tutorial
3 Comments
The Original Maleficent

The Original Maleficent

Maleficent transformation!

June 25, 2014

Saw Disney’s new Maleficent movie with Angelina Jolie and was pleasantly surprised (my rule when going to movies is “expect nothing” and it usually works out quite well). However, I am partial to the original Maleficent, and I am going to show you how to transform yourself into her with ample time to spare before Halloween so you can even do a few practice rounds if you are inclined to do so. I have divided this tutorial into two short instructional videos: makeup, and horns. As for that magnificent cape and that magic wand, however, you’re on your own.

Want more DIY transformations? Check out my most recent Halloween costumes.

Makeup:

https://www.youtube.com/watch?v=Lp5fo8130zA

Horns:

http://www.youtube.com/watch?v=kAya2muwfaw

List of materials with links below!

~~~~~~~~~~~~~~~~~~~~~~~~~~~~~~~~~~~~~~~~~~~

Vi la nueva película de Disney “Maléfica” con Angelina Jolie y no solo me sorprendió, me agradó (mi regla cuando voy a ver una pelo es “no esperes nada” y por lo general me ha dado buenos resultados). Sin embargo, mi lealtad sigue con la Maléfica original, y aquí te voy a enseñar cómo puedes convertirte en ella con meses de anticipación (si es que lo piensas hacer para Halloween) para que puedas hasta practicar un par de veces si quieres. He dividido este tutorial en dos videos: maquillaje, y cuernos. En cuanto a la capa magnífica y la varita mágica, estoy segura que algo se te ocurrirá.

¿Quieres más inspiración de transformaciones DIY? Échale un ojo a mis disfraces de Halloween más recientes.

Maquillaje:

http://youtu.be/QdN4RnK7VWU

Cuernos:

https://www.youtube.com/watch?v=2BgPc2-hlgU


Smashbox Photo Finish Color Correcting https://amzn.to/2PstMM1
Mascara
Ben Nye Creme Foundation Frankenstein

MAC Painterly Paint Pot https://amzn.to/2PWFL5q
Lavender Eye Shadow (brand unknown) Ben Nye Lumiere Grande Colour Palette https://amzn.to/2MLjkm5

Mac 224 Tapered Blending Brush https://amzn.to/2ouwh4V NYX
The Curve Liner https://amzn.to/2PwPdf5

Ardell Curvy Lash-415 Black https://amzn.to/2PwPApZ

Duo Brush On Striplash Adhesive White/Clear 5g by Duo https://amzn.to/2PVW9mM NYX

Hot Singles Eyeshadow Zen http://www.ulta.com/hot-singles-eyesh...
urban decay lip primer potion https://amzn.to/2N6b4w6

MAC Cremestick Liner Velvetella (discontinued)

MAC Retro Matte Lipstick All Fired Up https://amzn.to/2C9ZsEc

Ben Nye Neutral Set Colorless Face Powder https://amzn.to/2PRpW01

Ben Nye Final Seal https://amzn.to/2Po30nZ


check out my other costumes!

Catrinas.jpg

Sugar Skull / catrina

ursula.jpg

ursula making waves

brillantina.jpg

Full face of glitter

costume collage.jpg

costume look book

In beauty, do-it-yourself, dressing up Tags Costume, Halloween, makeup, Maleficent, original, tutorial, video
1 Comment
dsc02119.jpg

Bring the magic of Instagram to life!

December 10, 2013

final instacollage smallThose who know me know this: I reeeally like pictures. I love incorporating them into my gifts to make them personal and memorable. My usual go-to is to choose a great picture, buy a frame, sit down with a magazine or two, cut out some fun quotes and place them strategically all over the photo for a little warmhearted good humor. But this year I wanted to go the extra mile for my boyfriend Benjamin’s 30th Birthday. I’m not sure if I was searching the internet for inspiration or if it was just serendipity, but I somehow stumbled across this gorgeous instagram-themed advent calendar by The Thinking Closet (just found her blog and am totally digging it!). I saw that they sold the frame kit online (no stores carry them here in Houston—believe me, I checked!) but as the semi-procrastinator that I am it was way too late to be wasting time waiting for the mailman, so I had to just buckle down and make one myself. This allowed for some special modifications like including real mini-clothespins (which he loves), and making a frame with 30 pictures rather than 25. So here’s a step-by-step of how I made THIS beauty:

~~~~~~~~~~~~~~~~~~~~~

Los que me conocen saben cuánto me encantan las fotos. Me gusta incorporarlas en mis regalos para que sean mas personales y memorables. Típicamente elijo una foto super buena, compro un marco, y me siento con un par de revistas a recortar palabras y frases apropiadas (y a veces sumamente esporádicas) para esparcir un poquito de cariño con humor. Pero en esta ocasión (el cumpleaños número 30 de mi novio Benjamin) quería saltarme la barda. La verdad no recuerdo si estaba en busca de inspiración cibernética o si fue pura suerte, pero de alguna manera me topé con ESTE hermoso 'advent calendar' estilo instagram. Vi que venden los juegos con marco alambres y clips en linea (no los tiene ninguna tienda aquí en Houston; créeme que revisé!) pero como suelo hacer todo último momento, eso de estar esperando al cartero no iba a funcionar, así que me puse las pilas y me lo hice yo. Esto permitió que hiciera unas modificaciones especiales como incluir mini-pinzas de madera (que le encantan) y cambiar la cantidad de fotos de 25 a 30. Asi que ahí les va paso por paso, cómo hice este instacollage:

Materials for the frame (all from Michaels) ~~~~~ Materiales para el marco (todo de Michaels)

Everything you will need for the frame ~~~~~ Todo lo que vas a necesitar para el marco

Choose a frame with soft wood - you will be screwing with pliers or manually! ~~~~~ Elige un marco con madera suave - vas a estar atornillando con tenazas o con la mano!

Use your measuring tape to ensure even spaces between your screws. Also keep the depth consistent. ~~~~~ Usa tu cinta métrica para dejar espacios uniformes entre tornillos. También asegúrate que todos estén a la misma profundidad.

I chose to space them just over 2 inches apart ~~~~~ Aqui dejé poquito mas de 2 pulgadas de distancia entre cada uno

Once all the screws are in, it's time to tie the string ~~~~~ Ya que estén todos los tornillos, es tiempo de amarrar la cuerda

Tie it as tight as possible ~~~~~ Amárralo para que quede lo más ajustado possible

Frame is almost ready! ~~~~~ Ya casi está el marco!

Now for the pictures: Choose 30 of your favorite pictures from instagram (or anywhere else, really). I chose 60 because narrowing things down is not my forté... ~~~~~ Ahora vamos con las fotos: Elige 30 de tus fotos favoritas de instagram (o de cualquier lado). Yo elegí 65 porque eso de decirle 'no' a una foto como que no se me da...

First, make sure they are all cropped in perfect squares. Then, modify your size specifications using photoshop. I changed all mine to 300 pixels/inch and then changed the size to 1.8 inches.  ~~~~~ Primero, asegúrate que todas las fotos sean cuadrados perfectos. Después, modifica su tamaño usando photoshop. Yo cambié todas las mías a 300 pixeles por pulgada y de ahí cambié el tamaño a 1.8 pulgadas.

Create a document with the measurements of a regular sheet of paper (8.5x11in). Copy and paste your squares onto the document one by one. This is your print layout. ~~~~~ Crea un documento en photoshop con las medidas de una hoja de papel (8.5x11in). Copia tus cuadros uno por uno y pégalos en el documento. Estas son las hojas que vas a imprimir.

Once you print your pictures, it is time to slice them up! Be extremely careful... scissors may work better for this step than this sliding apparatus. ~~~~~ Ya que tus imágenes estén impresas, es tiempo de cortarlas! Ten mucho cuidado, es posible que para este paso las tijeras sean mas efectivas que este aparato.

You will need card stock paper in white. And black if you like options. ~~~~~ Vas a necesitar papel tipo cartulina en blanco. Y en negro si te gusta tener opciones.

Cut the card stock larger than the pictures so it peeks out and frames them. I cut mine at exactly 2 inches. ~~~~~ Corta la cartulina mas grande que las fotos para que se vea el marquito alrededor. Yo lo corté en exactamente 2 pulgadas.

Attach pictures to card stock paper. I used scotch tape. ~~~~~ Pega las fotos con la cartulina. Yo utilicé cinta adhesiva.

I also did a set with a black background to switch things up. ~~~~~ También hice unas fotos con fondo negro para tener un poco de variedad.

DSC02116

30 pictures in all their glory ~~~~~ 30 fotos en su máximo esplendor

When you are ready to see fresh pictures, you can switch them around easily. ~~~~~ Cuando estés listo para ver fotos nuevas, puedes intercambiarlas fácilmente.

So many memories captured behind this glass! ~~~~~ Hay tantas memorias representadas detrás de este vidrio!

DSC02131DSC02141DSC02145

Learn from my mistakes:

1. Leave a little extra room on top for the clothespins to stand up straight.

2. Leave a little extra room on the sides to account for the thickness of the frame around the glass.

3. Do NOT waste your time going to print your pictures at Kinko's. Even after all my hard work formatting the photos, making them exactly the right size and putting them on a regular paper-sized document they COULD NOT figure out how to print them for me. (Isn’t that what they are supposed to DO there?) I ended up printing them off of the most basic program in the world (Preview) at my boyfriend's office.

4. Give yourself a little extra time to have everything ready on time ;)

~~~~~~~~~~

Aprende de mis errores:

1. Deja un poco de espacio extra en la hilera de arriba para que las pinzas puedan colgar verticales.

2. Deja un poco de espacio extra a los lados - hay que tomar en cuenta el grosor de el marco alrededor del vidrio.

3. NO pierdas tu tiempo tratando de imprimir tus fotos en Kinko’s. Después de todo mi trabajo ajustando el tamaño de las fotos y colocándolas en un documento del tamaño exacto de una hoja de papel, NO encontraron la manera de imprimírmelas. (No se supone que eso es lo que hacen allí?) Terminé yendo al trabajo de mi novio e imprimiéndolas allí en el programa mas básico del mundo (Preview).

4. Date un poco de tiempo extra para terminar todo a tiempo ;)

DSC02149

In gifts, home, photos, Projects Tags advent calendar, birthday, boyfriend, calendar, collage, Decorations and Props, DIY, do-it-yourself, frame, gift idea, instagram, original, picture frame, present, tutorial, unique
8 Comments
Image
Image

Make your own Magnetic Chalkboard Wall

November 4, 2013

The chalkboard wall.

Let’s be honest, at some point in your life you have considered having one in your house. You’ve fantasized about leaving your loved ones adorable little notes, jotting down memos in perfect typography, and leaving grocery lists that add a functional yet funky element to your decor.

Well, I too had been searching for just the right wall to transform and found it when we moved in to our new place here in Houston.

So, after 3 jaunts to the Home Depot (I can’t ever seem to get everything on the first try), 4 days of fumes, and hours of obsessing over the amazingly inspiring images of chalkboard art all over the internet, we finally have a finished product.

We are going to be writing, painting, tracing, and erasing for a looooong time!

Check out the video tutorial in English here :)


materials:

Magnetic Primer https://amzn.to/2IRlqPb
Painter's Tape https://amzn.to/2L51bdg
Tintable Chalkboard Paint (Take it to Home Depot for tinting) https://amzn.to/2ITWgiK
Or Black Chalkboard Paint (not shown in this video) https://amzn.to/2IVRDVt
Detail brush https://amzn.to/2L1fpvQ
Extendable Paint Roller Frame https://amzn.to/2GZjC0z (buy foam separately)
Foam for Paint Roller
Small Paint Roller
Plastic disposable trays for paint
Screw driver
Measuring tape

The steps:

This Project requires a minimum of 4 days, because of the long waiting periods between layers of paint. 

1.       Gather the materials. 
If you use the tintable Rust-Oleum paint that I used, you’ll need to stop by a hardware store like Home Depot to add the color of your choice.

2.       Prepare the space
Tape off the borders of your project, making sure to use enough pressure to keep paint from seeping under it.  The can of paint that I used said that it covered a 16ft2 area, but it ended up covering way more than that in my project.
Remove outlet plates.

3.       It’s a good idea to cover your hair and body as much as possible with clothes you don’t mind getting paint on.  You can use gloves to protect your hands and arms, or, you could just use bags like I did in the video. A hat or bandana is a good choice to keep flecks of paint from landing in your hair.

4.        Optional: Paint two layers of magnetic paint, waiting 30 minutes between layers, and wait a full 4 hours before starting your first layer of chalkboard paint.

Use even, steady strokes to make sure that it goes on evenly.  Using a smaller roller will help ensure a more even spread of paint, though it will take longer. Use the finishing brush to get the paint all the way to the edges.

5.       Paint two layers of chalkboard paint, waiting 4 hours between layers.

6.       Wait THREE DAYS before the next step.

7.       To condition your chalkboard, rub a piece of chalk on its side all over the entire chalkboard, and then erase it before using it.

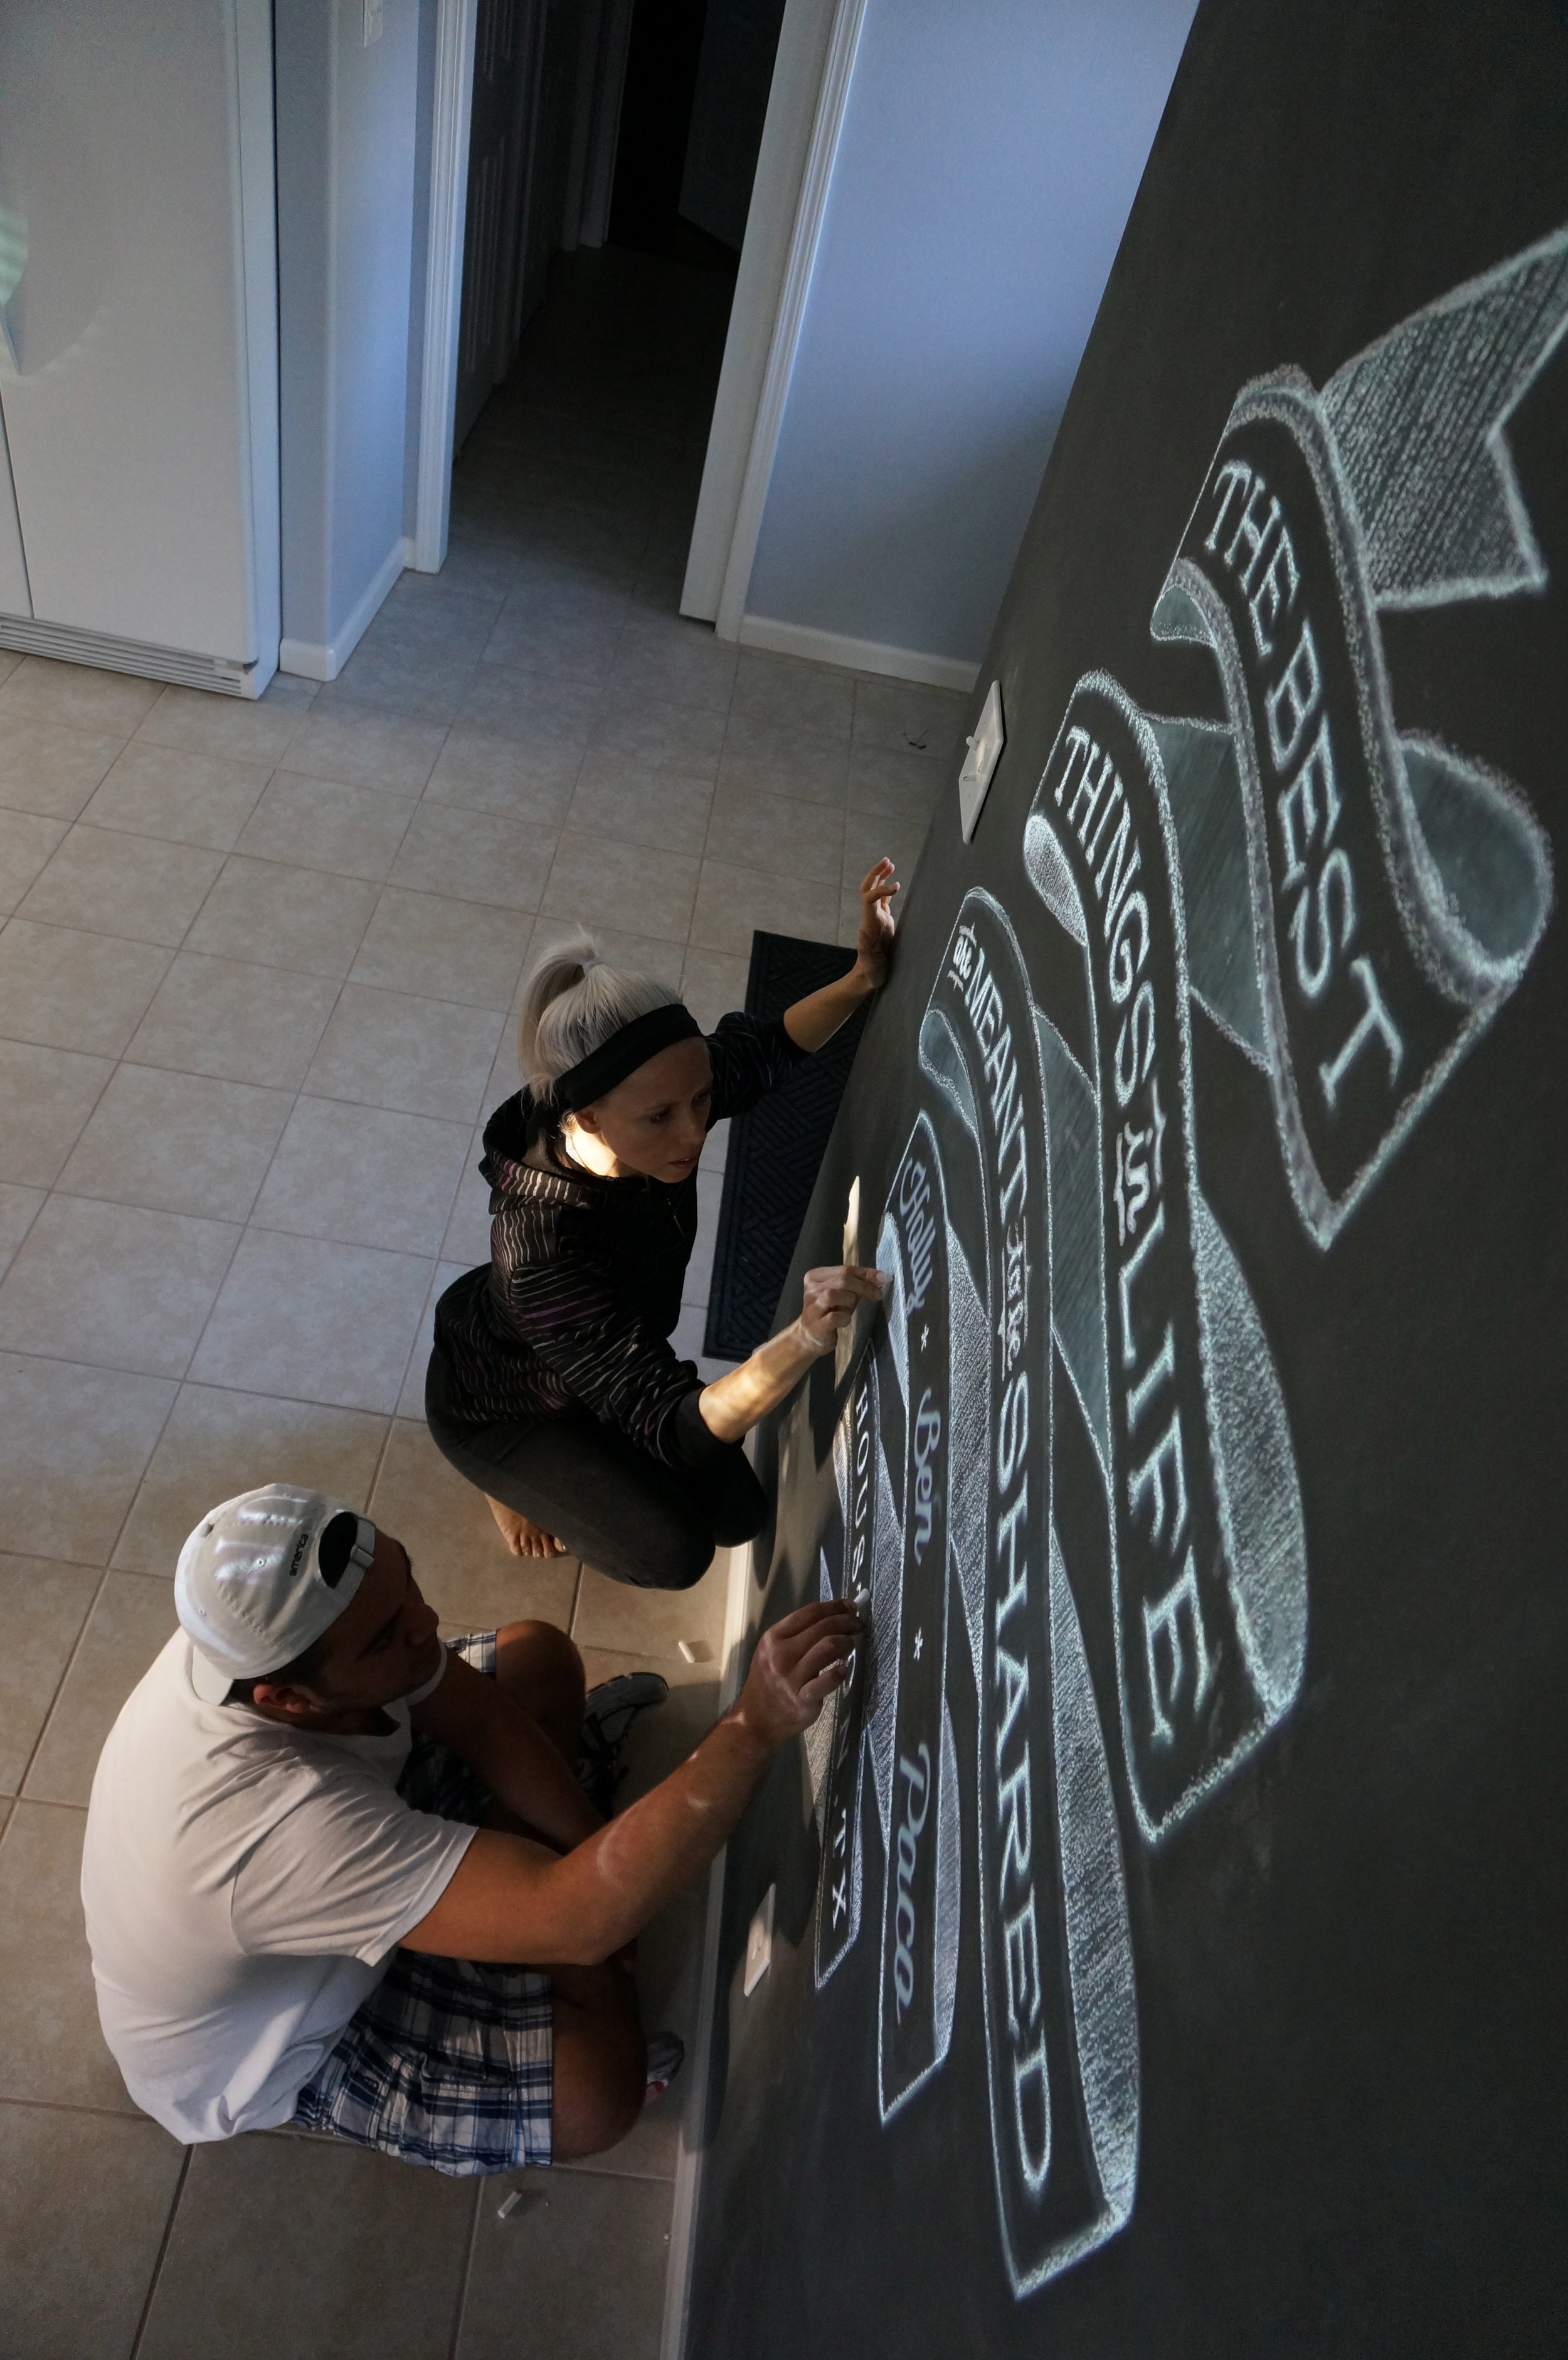
8.       Write, draw, add magnets, now’s the time to make it look just the way you want it!

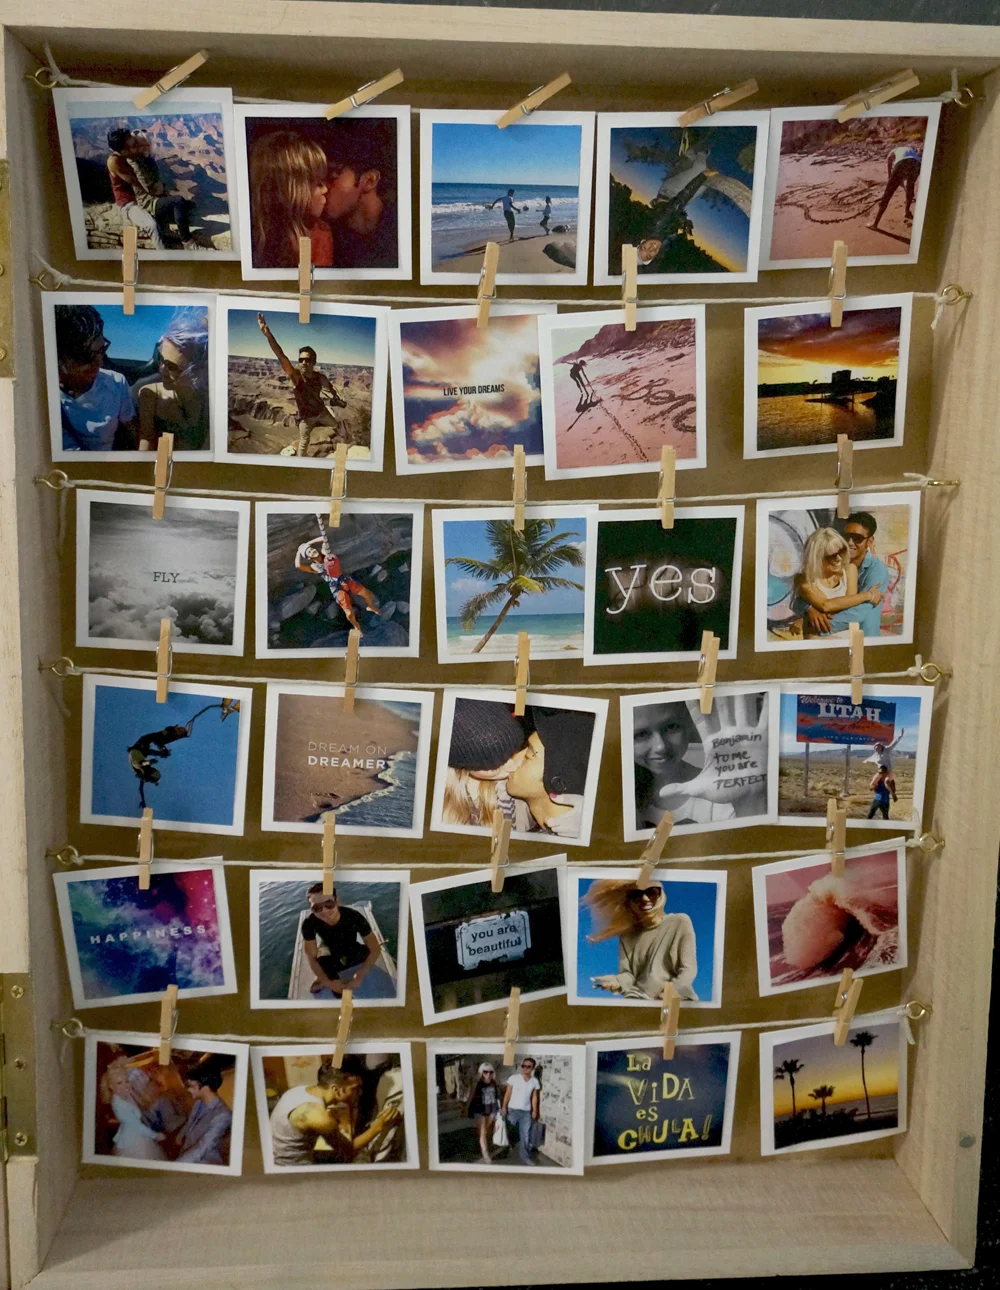
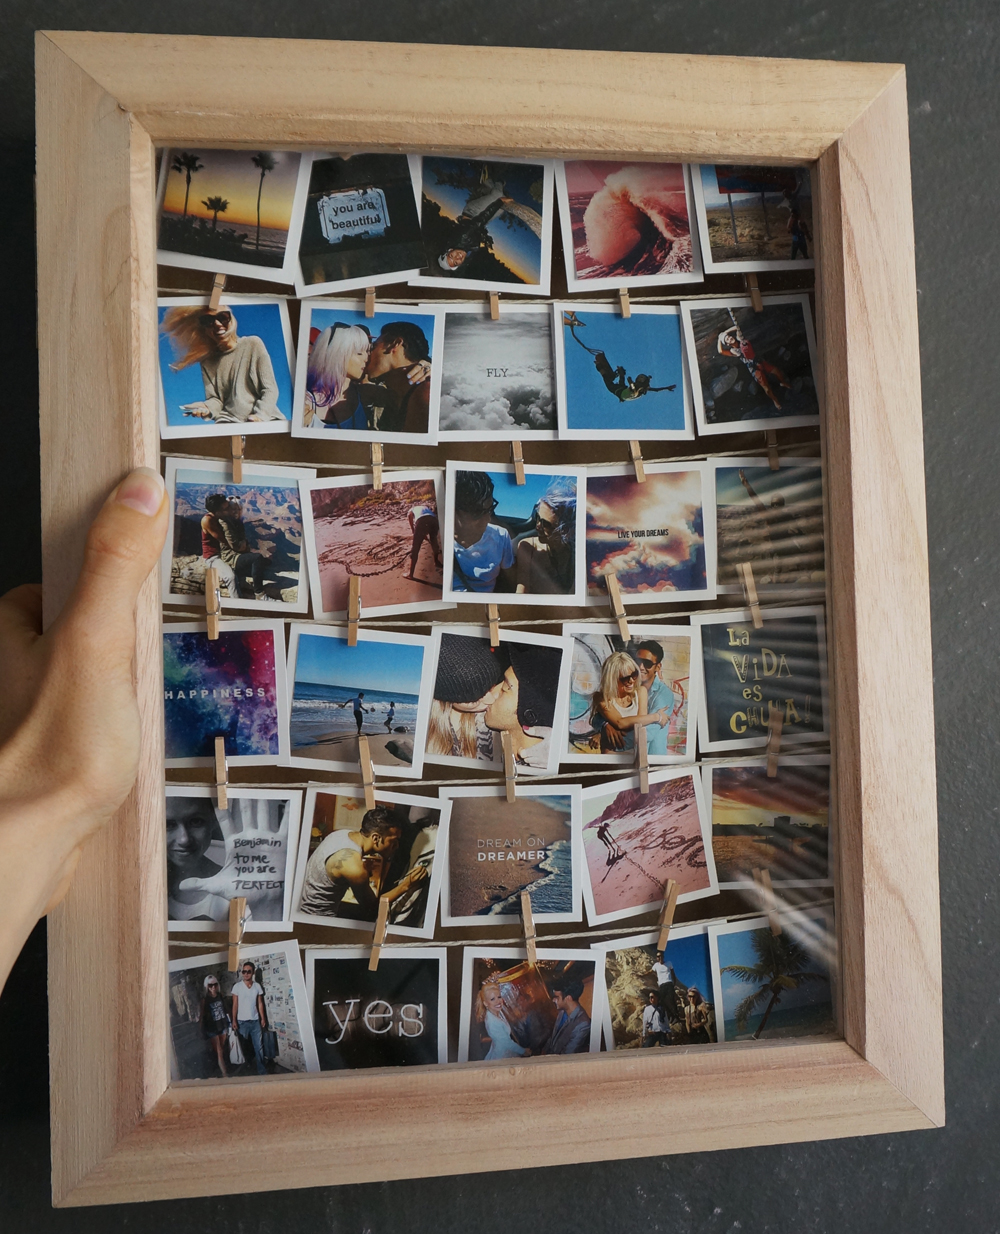
Here are a two examples of how I used my magnetic chalkboard:
An inspiring design  

Using Magnets on my magnetic chalkboard

~~~~~~~~~~~~~~~~~~~

La pared convertida en pizarrón.

Seamos sinceros: en algún momento de tu vida has considerado tener una pared/pizarrón en tu casa. Has fantaseado con la idea de dejarle notitas cursis a tu amor, de escribir memos en tipografía perfecta, y dejar listas para el super que le dan ese toque funcional y moderno a el look de la casa.

Pues, yo también había estado buscando la pared ideal para poder someterla a esta transformación y al fin la encontré en nuestra nueva casa aquí en Houston.

Asi que, después de 3 idas al Home Depot (siempre se me olvida algo), 4 días de oler a pintura, y horas de inspirarme con fotos de “chalkboard art” en el internet, por fin tenemos un producto final.

Vamos a estar pintando dibujando trazando y borrando por muuuucho tiempo!

Checa el tutorial en español  aquí :)


Materiales: 

Pintura Magnética https://amzn.to/2IRlqPb
Cinta Adhesiva https://amzn.to/2L51bdg
Pintura teñible para pizarrón (Se puede teñir en Home Depot) https://amzn.to/2ITWgiK
O pintura negra para pizarrón (no fue usado en este video) https://amzn.to/2IVRDVt
Brocha https://amzn.to/2L1fpvQ
Rodillo extendible https://amzn.to/2GZjC0z (buy foam separately)
Foam for Paint Roller
rodillo pequeño
Dos contenedores de plástico
destornillador
cinta métrica
 

Los pasos

Este Proyecto require un mínimo de 4 días, por las muchas pausas entre las capas de pintura.

1.       Junta los materiales.

Si usas pintura teñible de Rust-Oleum, tendrás que llevarlo a una tienda como Home Depot, para teñirla.

2.       Prepara el espacio. 
Pon la cinta a los límites, usando bueno presión, para que la pintura no se meta por abajo.  Toma en cuenta el área que puede cubrir la pintura.  La lata de pintura magnética que usé decía que cubría 16pies2, pero en verdad, pudo cubrir mucho más.
Quita los enchufes

3.       Es recomendable cubrir tu cuerpo lo más posible con ropa que se puede manchar.
Puedes proteger tus brazos de la pintura con guantes, o con bolsas, como lo hice yo. También ayuda poner algún tipo de pañuelo o sombrero en la cabeza para protegerte el pelo.

4.       Opcional: Pinta dos capas de pintura magnética, esperando 30 minutos después de cada capa, y luego 4 horas antes de empezar con la pintura de pizarrón.  

Usa trazos uniformes y nivelados para que todo quede parejo.  Usa la brocha para extender la pintura hasta las orillas.

5.       Pon dos capas de pintura de pizarrón, esperando 4 horas entre las capas.

6.       Espera 3 días después de poner la última capa de pintura. 

7.       Para condicionar tu pizarrón, pasa un gis sobre todo el pizarrón, y luego bórralo antes de usarlo.

8.       ¡Escribe, dibuja, pon imanes…. Lo que tú quieras!


Les dejo ejemplos de cómo usé mis pizarrón magnético aquí:
Un diseño inspirador

Imanes en mi pizarrón magnético

Image
Image
Image
Image
Image
Image
Image
Image
In do-it-yourself, fun, home, Projects, video Tags bilingual, blackboard, chalk, chalkboard art, Chalkboard wall, DIY, español, home decor, magnetic, make your own, paint, pizarrón, rust-oleum, tutorial
11 Comments

Latest Posts

Featured
Dec 19, 2018
La vie en rose
Dec 19, 2018
Dec 19, 2018
Dec 19, 2018
Starbucks Mermaid Costume / Disfraz de la Sirena de Starbucks
Dec 19, 2018
Dec 19, 2018
Aug 22, 2018
Liquid Copper + Philosophy
Aug 22, 2018
Aug 22, 2018
Mar 6, 2018
The "Silverlake" of Houston?
Mar 6, 2018
Mar 6, 2018
Oct 5, 2017
90's grunge + obsessions
Oct 5, 2017
Oct 5, 2017
Jul 7, 2017
500K Subscribers!?
Jul 7, 2017
Jul 7, 2017
Feb 12, 2017
Winter? What Winter?
Feb 12, 2017
Feb 12, 2017
Dec 13, 2016
DIY Star Tree Topper
Dec 13, 2016
Dec 13, 2016
Nov 1, 2016
Ursula making waves!
Nov 1, 2016
Nov 1, 2016
Oct 3, 2016
Carli Bybel x Missguided x Downtown Houston
Oct 3, 2016
Oct 3, 2016

Powered by Squarespace